10 Essential Mechanical Checks to do Before Your RV Road Trip
- Jun 5, 2025
- 12 min read
Mécanique VR Québec accompanies you on the road.

The List of 10 Essential Mechanical Checks
1. Brakes
3. Batteries
4. Fluids
5. Lighting
6. Suspension and steering
8. Belts
9. Ventilation and Air Conditioning
10. Exhaust System
Bonus. Your Emergency Kit
A departure that goes wrong…
Marc and Julie, a retired couple passionate about the outdoors, had planned everything for their road trip to the Rockies—everything except for a strange noise when braking during the very first miles.
An unexpected stop at an unfamiliar garage, stress, lost time, and costs that could have been avoided.
Every RV season should begin with a mechanical inspection. Too many travellers ignore warning signs or skip crucial steps. And yet a simple preventive check can stop a dream from turning into a nightmare.
The Most Common Mistakes Before Setting Off on a Road Trip
All too often, small oversights are the source of the biggest issues. Forgetting to check tire expiration dates, failing to properly close the engine hood, ignoring illuminated warning lights on the dashboard. These errors are common, mundane, but far from insignificant.
A thorough walk-around of your RV, a printed checklist, and paying close attention to any unusual noises can make all the difference between a successful journey and a roadside breakdown.
Why a mechanical inspection routine is essential

An RV is far more than just a vehicle: it’s a blend of mechanical systems, electrical components, technology, and mobile comfort.
Before each departure, you’re putting a several-ton motorhome into motion. The weight, the distances, the extreme temperatures… everything puts your vehicle to the test.
A 60-minute check can prevent hundreds or even thousands of dollars in repairs.
Here are the 10 points that our experts at Mécanique VR Québec systematically inspect—and that you can also check yourself, or with our help.
1. BRAKES | Your best life insurance

Imagine a steep descent in Mauricie, with a sharp turn and… a brake pedal that responds sluggishly. This isn’t just a minor issue, it’s a critical safety risk. Before every departure, ensure your braking system is functioning perfectly.
Brake Pedal Test: Press firmly on the brake pedal. It should remain firm and not sink gradually. A spongy pedal often indicates air in the circuit or low brake fluid.
Low-Speed Road Test: On a level surface, perform a firm, straight braking maneuver. The RV should not pull to one side. If the vehicle veers, this could indicate a problem with the calipers or brake pads.
Brake Fluid Check:
Color: Dark brown or cloudy fluid usually means it’s oxidized and less effective.
Level: If below the minimum mark, the system risks pressure loss and pedal advancement.
Hygroscopic Property: Brake fluid absorbs moisture over time, which can cause premature boiling during heavy braking and significantly reduce braking force.
Component Inspection:
Brake Pads and Discs: Examine pad thickness and disc wear. An overheated disc may show micro-cracks.
Callipers: Check for leaks and ensure piston movement is smooth. Seized calipers lead to uneven wear and reduced braking power.
Hoses and Lines: Verify there are no bulges, cracks, or leaks. A damaged line can cause a sudden loss of fluid.
Un système de freinage en bon état est essentiel : moins de risques, meilleure tenue de route et sécurité renforcée pour vous et vos passagers.
2. TIRES | More than just a matter of pressure

An RV tire may look to be in good condition but be on the verge of blowing out. Rubber aging, accelerated by UV rays and ozone, is often invisible. Never neglect a thorough inspection: a flat tire or blowout during your trip can leave you stranded for hours.
Visual Inspection of the Sidewalls: Look for cracks, deformations, bubbles, or areas where the rubber appears to be thinning. Even a small fissure can develop into a rupture under pressure.
Embedded Objects: Inspect the tread for nails, stones, or any debris that could puncture the tire. Remove them immediately and check whether they have already caused a slow leak.
Cold Pressure Check: Use a reliable gauge to measure pressure before driving, ideally in the morning or after at least three hours of rest. Follow the manufacturer’s specifications printed on the sidewall or in the RV manual: under-inflation increases wear, while overinflation reduces traction.
Tread Depth and Wear: Verify that the depth is not less than 3 mm; beyond that, the risk of hydroplaning and loss of grip increases. Also check for uneven wear, which may indicate an alignment or suspension issue.
Manufacture Date: Refer to the DOT code on the sidewall to find the week and year of production. Tires older than 5 years begin to lose their properties, even if they appear intact.
Rim Condition: Ensure there are no cracks, deformities, or excessive rust around the mounting holes. A damaged rim can prevent proper sealing and cause a slow leak.
By performing these checks regularly, you not only ensure your safety but also extend the life of your tires while reducing fuel consumption.
3. BATTERIES | A departure without starting is a no

Finding yourself without power at sunrise, at the far end of Gaspésie, guarantees unnecessary stress. Before every departure, ensure that your batteries (engine and auxiliary) are in perfect condition to avoid any inconvenience.
Voltage Measurement: Using a voltmeter, check the voltage of both batteries. A reading below 12.4 V indicates insufficient charge and may prevent the engine from starting.
Terminal Cleaning: With the engine off, disconnect the battery cables. Remove any white corrosion from the terminals and clamps, then firmly tighten each connection to ensure optimal electrical contact.
Load Test: Turn on several appliances (refrigerator, lights, water pump). Observe the voltage drop, if it falls rapidly, this may indicate a weak battery or a faulty alternator.
Visual Inspection: Check for electrolyte leaks, cracks in the battery casing, or frayed cables. A damaged battery risks sudden discharge.
Professional Check: If you have any doubts after performing these checks, have your battery and alternator tested in a RV repair shop. A comprehensive load test will confirm their true condition.
A healthy battery guarantees reliable starts, prevents breakdowns in isolated areas, and gives you peace of mind on your RV adventures.
4. FLUIDS | Fluids to monitor closely
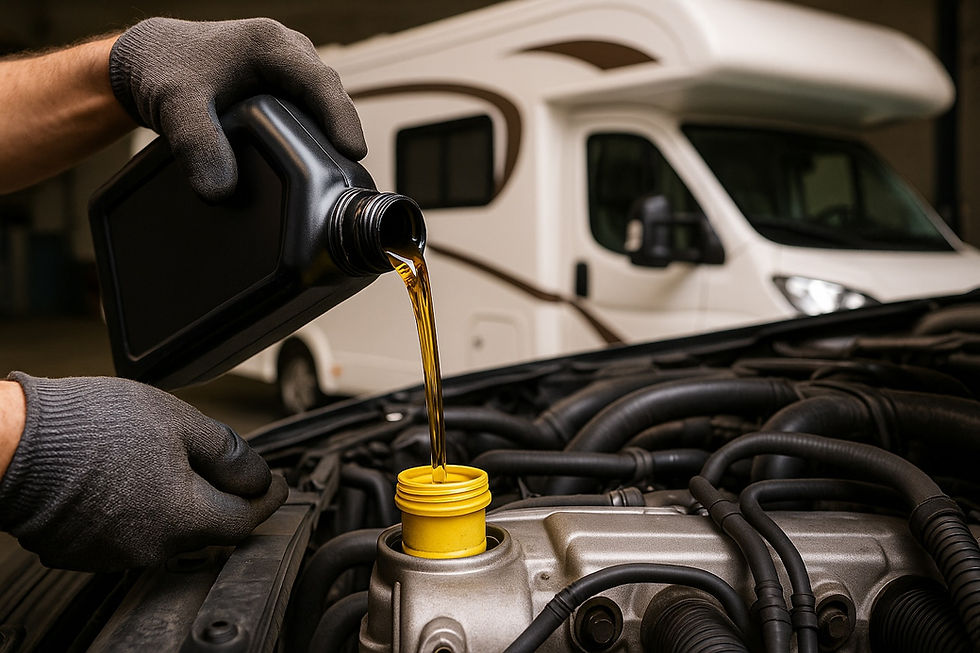
Well-maintained fluids ensure lubrication, cooling, and optimal performance of your RV. A low level or contaminated fluid can cause overheating, premature wear, or even an unexpected breakdown.
Motor Oil :
Level : Check on the dipstick (engine cold and on level ground); a level below the minimum compromises lubrication.
Color : Amber to light brown oil is normal. Thick black oil or a gritty consistency indicates it’s overdue for a change or that the engine is dirty.
Odor : A smell of fuel (gasoline or diesel) often signals a faulty injector or advanced wear on the piston rings.
Coolant :
White Deposits : Look around the cap or radiator—white crusting is a sign of a leak or internal corrosion.
Sweet Smell : A faint caramel scent can betray a leak at the head gasket or a cracked radiator hose.
Color : The coolant should be clear (green, red, or pink, depending on type). Cloudy or rusty coolant suggests ineffective cooling.
Transmission Fluid :
Level and Color : Clear to slightly pink fluid (for modern automatic transmissions) indicates good condition. Dark brown fluid or a burnt smell means an immediate drain is required.
Viscosity : Dip your finger in the fluid—it should be smooth with no particles.
Power Steering Fluid :
Level : Below the minimum makes steering hard and causes squealing at low speeds.
Color : A transparent or slightly pink fluid is normal. Black or opaque fluid means contamination (dust, water).
Windshield Washer Fluid :
Importance : Good visibility in rain or snow depends on a functioning washer system.
Antifreeze: In cold seasons, use a freeze-resistant formula to prevent it from freezing in the reservoir or lines.
Chaque fluide a son rôle spécifique ; n’attendez pas qu’une alerte s’allume au tableau de bord : contrôlez-les avant chaque grand départ.
5. Lighting | to be seen, and to understand your intentions

Partial or faulty lighting increases risks, especially at night or in fog. Before every departure, check all lights to ensure optimal visibility and prevent collisions.
Headlights (Low Beam and High Beam): Turn on each headlight one at a time. Low beams should produce a consistent, stable beam without flickering. High beams must illuminate far ahead without blinding oncoming drivers.
Brake Lights: Gently press the brake pedal several times to verify that all three lights (center and outer rear) illuminate simultaneously. A missing or dim brake light may delay the reaction of the driver behind you.
Turn Signals (Front and Rear): Activate each turn signal separately and check the blink rate (approximately 60–120 flashes per minute). A signal flashing too quickly often indicates a burned-out bulb or poor connection.
Marker Lights: Ensure that all side clearance and roof-level marker lights are working to outline the width and height of your RV. Missing side markers can turn your RV into an invisible obstacle for oncoming traffic.
Reverse Lights: Shift into reverse (with the parking brake engaged) and observe the brightness. Weak or absent reverse lights compromise safety during nighttime maneuvers and increase the risk of striking an obstacle.
Trailer Connection: If you are towing a trailer, plug in the 7- or 13-pin connector and test every function (turn signals, brake lights, taillights). A bad connection is common—inspect both male and female plugs for corrosion or bent pins.
Burned-Out Bulbs: Replace any bulb with a broken filament or reduced intensity immediately. Choose high-performance bulbs (LED or halogen) that meet the manufacturer’s specifications.
Good visibility means clear communication with other drivers. You’re seen = you’re avoided.
6. SUSPENSION AND STEERING | Comfort in silence
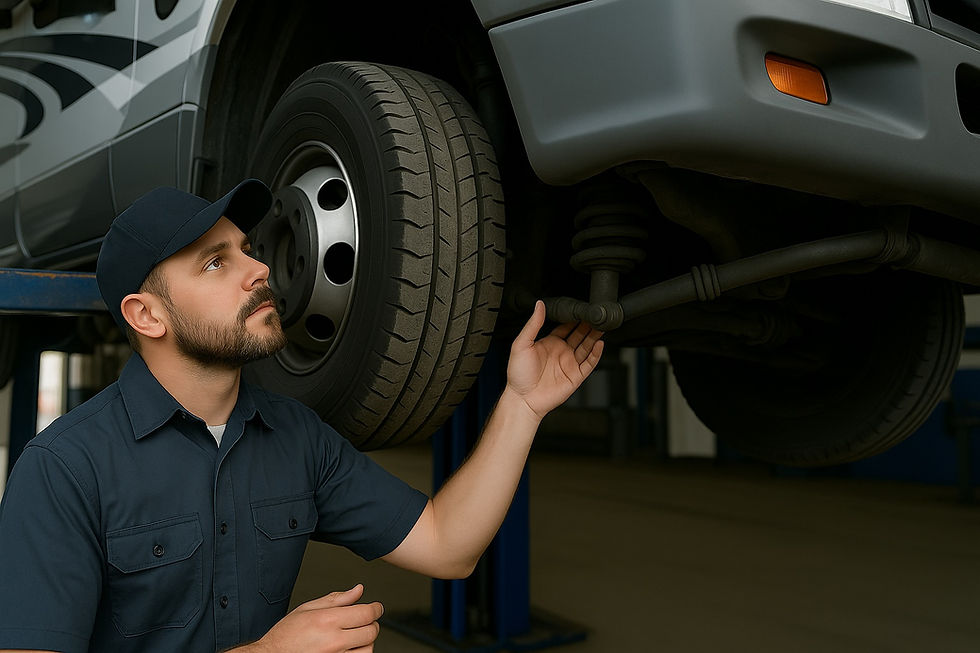
An imprecise steering, a dull noise over bumps, or wandering at high speed are often symptoms of worn ball joints, shock absorbers, or bushings. These components contribute to handling and directly influence braking distance. Neglecting them compromises both your safety and your comfort.
Ball Joints (Tie Rod Ends): Check that they show no excessive play or visible wear. A clicking noise when you turn the wheel can indicate a fatigued ball joint that needs replacing.
Shock Absorbers: Inspect for oil leaks and push down on each corner of the RV (engine cold). If the vehicle bounces more than once, the shock absorbers are likely weak. A worn shock absorber negatively impacts stability, especially in corners.
Bushings (Suspension Mounts): Examine the rubber for any cracks or tears. Deteriorated bushings can cause vibrations, dull noises, and premature wear on other suspension parts.
Road Test: Drive at low speed over a rough surface to listen for thumps or feel unwanted movements. A steering that feels too loose or pulls to one side may stem from improper adjustment or a failing component.
Wheel Alignment: An improperly aligned front end can cause uneven tire wear and accelerate suspension fatigue. Regularly check the geometry to ensure optimal handling.
Sway Bar Links: Inspect the stabilizer bar end links: excessive play creates pronounced body roll in turns and a lack of precision in straight-line driving.
If in doubt, entrust your RV to a professional for an in-depth inspection: a simple preventive replacement can spare you from loss of control or costly repairs.
7. UNDERNEATH YOUR RV | Where leaks hide
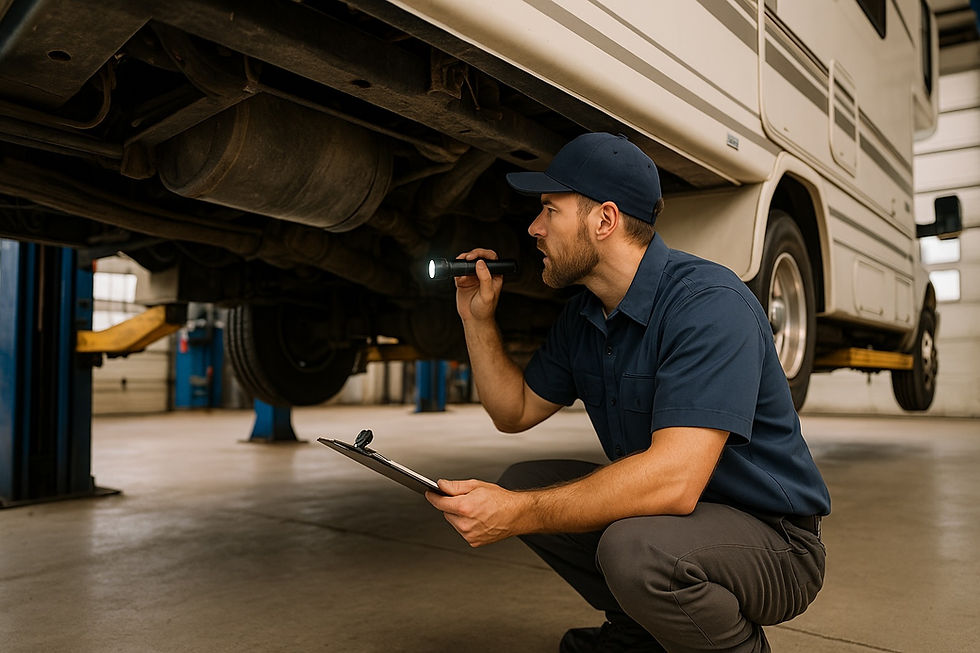
The underside of the RV is often overlooked, yet it’s where the biggest warning signs hide: leaks, torn cables, loose supports, and corrosion. Ignoring this area could lead to an unpleasant surprise on the road.
Ground Stains After Parking: Inspect the area beneath your RV for spots of oil, colored water (coolant), or gasoline. Even a small drop can indicate a developing leak.
Brake Lines: Visually check both rigid lines and flexible hoses for any signs of grease, bubbling, or swelling. A damaged brake hose can compromise your braking safety.
Tanks (Fuel, Propane, Wastewater): Ensure they are securely mounted with no signs of corrosion or stress on the fasteners. A loose tank can crack or detach while driving.
Propane Line: Trace the circuit from the bottles to the appliances (water heater, stove); a loose fitting can lead to a dangerous gas leak.
Supports and Fasteners: Check all suspension brackets, pipe clamps, and exhaust hangers for any loose or rusted parts. A loose component can rub, become damaged, or even fall off while in motion.
Corrosion and Weak Spots: Inspect every section of the undercarriage for areas of advanced rust, especially around welds and mounting points. Untreated corrosion can weaken the structure and cause a failure or leak.
Don’t wait for a minor drip to turn into a catastrophe; regular inspections of the underside—using a flashlight and mirror if needed—will let you address any issue before it strands your RV.
8. BELTS | Your engine under power
Accessory belts drive the alternator, the power steering pump, and sometimes the air conditioning compressor: if they break, you’ll face a guaranteed loss of electrical charge or engine overheating. Visually inspect them: look for cracks, frayed areas, or any warping. Feel them: they should be firmly tensioned, with no excessive flex.
Water pump belt: a squealing noise at cold start indicates a tension issue.
Radiator and heater hoses: they carry vital fluids; old rubber can become soft or hard, leading to a leak or a rupture.
Clamps and fittings: a loose or rusted clamp can allow fluid to escape and cause overheating.
Run your hand along each hose (engine cold): it should be pliable, with no hard spots or bulges. If you detect a stiff hose or one with a swelling, replace it immediately. Similarly, a simple tension adjustment or a preventive replacement at the workshop will often save you from extra costs later.
9. VENTILATION AND AIR CONDITIONING | Your comfort depends on them

A trip can quickly become a nightmare if the ventilation system fails, especially during a heatwave or a humid autumn. Before every departure, take the time to test all air and heating circuits to avoid long periods without cooling or defogging.
Manual and Automatic Ventilation: Cycle through each fan speed to verify airflow power and the absence of abnormal noises (squeaking, crackling).
Air Vents: Visually inspect all vents to ensure they aren’t blocked by dust or debris (hair, pet fur). An uneven airflow may indicate a clogged filter or a defective blower motor.
Propane Heater: Run the heater on MAX to confirm that the flame remains steady and blue. A flickering or yellow flame can signal a combustion issue, a partially obstructed duct, or a poor gas supply.
Defrost Systems: Activate the windshield defrost and then observe how quickly and evenly warm air is distributed. Slow defrosting can result from low gas pressure or a faulty heating element.
Air Conditioner: Set it to full power to check that the temperature drops rapidly and that the air remains cool, without unpleasant odors. A musty smell or lukewarm air may indicate a clogged evaporator or a refrigerant leak.
If you notice any moldy odor, persistent noise, or poor air distribution, have the filters, blower motors, and cooling circuit inspected. Never leave without testing these systems the day before. Your comfort and your safety (defogging, air conditioning in extreme heat) depend on them.
10. EXAUST SYSTEM | Safety and Performance

Safety and Performance
The exhaust system ensures the expulsion of burned gases and protects the cabin from carbon monoxide. A leak or corrosion in the silencer, pipes, or welds can not only reduce engine power but also allow toxic gases into the interior.
Visual Inspection: Once cooled down, slip under the RV with a flashlight and look for cracks, holes, or heavily rusted areas on the silencer and pipes.
Signs of Poor Sealing: Listen for metallic rattling, whistling while driving, or a gas smell inside the cabin.
Supports and Fasteners: A poorly secured exhaust can vibrate, create excessive noise, or rub against the bodywork.
Gently wrap each pipe: it should feel solid, with no excessively weak points. If a mounting bracket is broken or loose, you will hear a dull thud over bumps. Over time, a well-maintained exhaust ensures optimal engine performance, reduces fuel consumption, and extends the lifespan of your RV.
BONUS. Your Emergency Kit | be ready
A well-maintained RV must also be ready for the unexpected. Prepare a kit including: basic tools (wrenches, screwdrivers, pliers), appropriate jack, headlamp, fuses, light bulbs, spare belt, gloves, jumper cables, temporary patching products.
Also add safety items: warning triangle, reflective vest, fire extinguisher, first aid kit. Store everything in an easily accessible compartment, and review its contents before each season.
When to do the inspection?
Ideally, plan a complete inspection at each change of season or before a long trip. If your RV has been stored for several months, allow a solid 60 to 90 minutes for a thorough check, with the engine cold.
If you drive frequently, shorten the interval to every three months. This discipline reduces premature wear, enhances your safety, and extends the lifespan of your RV.
Faites-le vous-même ou en atelier ?
Some checks are easy to do yourself with a bit of method: tire pressure, oil level, light test. But others require equipment or an expert eye, such as inspecting the brakes or the suspension condition.
If you have the slightest doubt, don’t hesitate to entrust this task to professionals. At Mécanique VR Québec, we have the tools and expertise to do it efficiently.
Vous n’êtes pas seul
Every week, RV owners consult us after experiencing an incident on the road. Almost always, it was preventable.
At Mécanique VR Québec, we support you before problems even arise. We can perform this complete inspection for you, or guide you to the best solution..

Comments