Why get a seasonal inspection for your recreational vehicle (RV)
- Apr 27, 2025
- 7 min read
Updated: May 26, 2025
Introduction
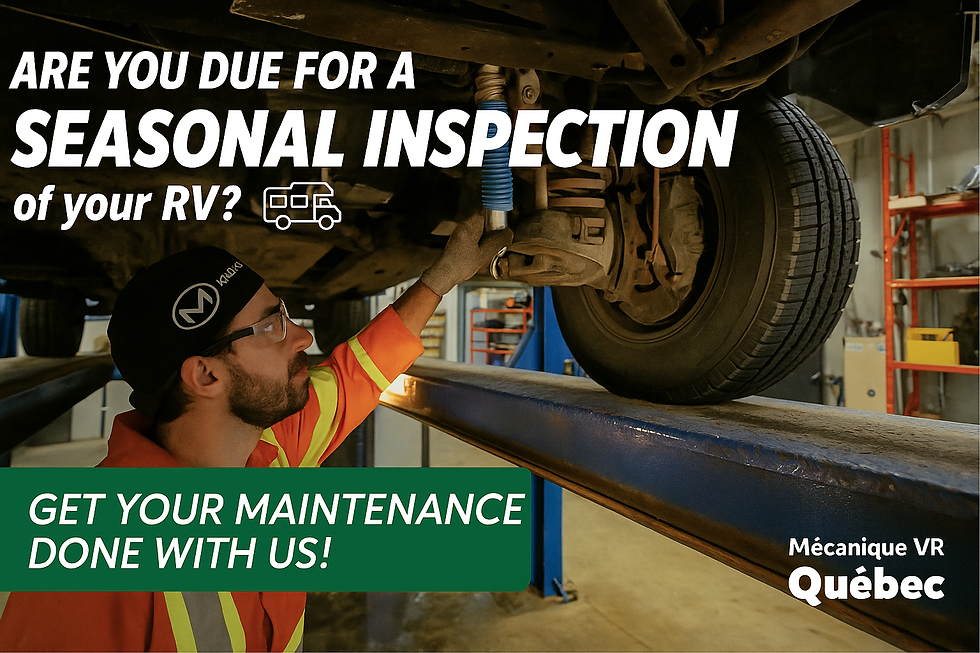
Your recreational vehicle (RV) is much more than just a means of transportation: it is a true mobile living space designed to offer you comfort and freedom on the road. However, to fully enjoy your travels and avoid unexpected interruptions, a complete seasonal inspection is essential before every departure.
This process not only ensures your safety and that of your passengers, but also helps prevent costly breakdowns that could compromise your adventure.
A neglected RV can quickly develop invisible issues, such as worn tires, weakened brakes, propane gas leaks, or water infiltrations ,that could lead to major risks and expensive repairs.
Beyond safety, regular inspections also help optimize your RV’s performance, extend its lifespan, and ensure compliance with insurance and road regulations.
In this guide, you will discover the main reasons for carrying out a seasonal inspection and a complete checklist of essential items to review before hitting the road, so you can travel with total peace of mind and enjoy your RV adventures to the fullest.
Why Get a Seasonal Inspection for your RV?
1. Safety First
Safety remains the top priority when traveling in an RV. A seasonal inspection helps identify issues often invisible to the naked eye, such as tire wear, brake weaknesses, water infiltrations, or electrical anomalies. If left uncorrected, these defects can cause serious accidents or critical breakdowns on the road. by detecting and addressing these problems early, you protect not only your vehicle but also the safety of its occupants. A well-inspected RV means a safer journey and greater peace of mind on the road.
2. Prevention of costly breakdowns
Neglecting a small water leak, a cracked window seal, or minor corrosion can quickly lead to major, costly repairs. A thorough seasonal inspection allows you to spot these issues early, often before they become critical. Acting quickly reduces the risk of vehicle immobilization during a trip and saves significant repair costs. By maintaining close monitoring of your RV’s overall condition, you protect your investment and ensure its reliability for future travels, while keeping your annual maintenance costs under control.
3. Legal Compliance and Insurance
Keeping your RV in good mechanical condition is essential to meet legal requirements and insurance coverage conditions. many insurance policies require regular maintenance; otherwise, claims could be denied. in addition, a non-compliant vehicle may result in fines or road restrictions. A documented seasonal inspection shows your diligence in maintenance, protects your rights in case of a claim, and ensures compliance with current road safety standards. It also ensures you travel legally and enjoy full protection on the road.
4. Optimization of Performance
A regularly inspected and maintained RV operates more efficiently and economically. properly inflated tires, responsive brakes, a well-oiled engine, and a reliable electrical system reduce fuel consumption, improve handling, and extend the lifespan of key components. This optimization leads to better road performance, greater comfort for occupants, and a lower risk of mechanical failures. A seasonal inspection helps maintain your RV’s optimal performance, ensuring smoother trips and reduced long-term operating costs.
5. Peace of Mind While Traveling
Hitting the road knowing your RV is in perfect condition lets you travel with peace of mind. A seasonal inspection reduces the uncertainty of unexpected breakdowns or technical issues. it allows you to focus entirely on the joy of the journey, rather than fearing a mechanical failure far from assistance services. By securing your RV before departure, you minimize stress, avoid unexpected problems, and fully enjoy your adventure. Traveling with confidence maximizes comfort and creates lasting memories without the inconvenience of avoidable issues.
Seasonal Inspection: Checklist of Items to Review
1. Tires and Suspension
Tire pressure: adjust according to manufacturer specifications to ensure optimal handling and prevent premature wear.
Overall tire condition: inspect each tire for uneven wear, cracks, splits, or signs of aging.
Wheel bolt tightening: check torque using a torque wrench, especially after a storage period.
Suspension: inspect shocks, springs, and air bellows for leaks, corrosion, or loss of efficiency, as weakened suspension directly affects stability and comfort.
Alignment: note any drift during road tests, which could indicate a need for realignment.
Preventive replacement: if tires show advanced deterioration, plan for replacement even if the tread depth remains acceptable.
2. Brakes
Brake pad thickness: measure and replace pads if the thickness is below manufacturer recommendations.
Discs or drums: check the friction surfaces for cracks, deep grooves, or signs of overheating.
Brake fluid: check the level and quality (a moisture test is recommended), as degraded hygroscopic fluid reduces braking effectiveness.
Brake hoses: visually inspect flexible lines for cracks or bulges.
Dynamic test: perform gradual and emergency braking to validate system response and check for abnormal noises.
Parking brake: ensure it holds the vehicle firmly even on a slope. too many clicks when engaging may indicate a need for adjustment.
3. Engine and Transmission (Motorized RV)
Engine oil level: check with the dipstick and top off if necessary. replace according to recommended intervals.
Transmission oil level: check when hot if applicable, as incorrect levels can cause major damage.
Oil, air, and fuel filters: inspect and replace if dirty to ensure optimal engine performance and improve fuel efficiency.
Cooling system: check coolant level, condition (color, smell), and inspect for leaks at the radiator or hoses.
Belts and hoses: inspect for wear, cracks, or sagging. replace any doubtful elements to prevent mechanical failures.
Possible oil leaks: visual inspection of the engine compartment.
4. Electrical Systems
Chassis and house batteries: measure voltage at rest and under load. clean terminals, check general condition, and replace aging batteries.
External lighting: check all lights (headlights, turn signals, brake lights, marker lights) to ensure visibility and legal compliance.
Interior lighting: test 12v and 110v fixtures. replace defective bulbs or check breakers if necessary.
Chargers, converters, and solar panels: verify proper operation and the condition of electrical connections.
Fuses and relays: inspect for signs of burning or overheating and keep spare parts onboard.
5. Propane Gas and Appliances
Gas leaks: use a detector or soapy water solution on connections to ensure no leaks are present.
¨ropane tank: check requalification date (required every 10 years) and the overall tank condition (corrosion, dents).
Propane appliances: individually test the heater, stove, water heater, and refrigerator to ensure they function properly.
Pressure regulator: inspect for stable performance and replace if faulty.
Piping: inspect hoses, fittings, and manual valves for any wear or damage. correct any issue immediately.
6. Water and Plumbing Systems
Tanks: inspect fresh, gray, and black water tanks for cracks or leaks. clean and disinfect if necessary.
Water pump: verify proper operation, pressure, and absence of leaks around the pump and fittings.
Hoses and fittings: visually inspect all pipes, clamps, and valves for leaks or structural weaknesses.
Faucets and showers: open to check pressure and steady flow, indicating no blockages or buildup.
Water heater: drain, inspect the sacrificial anode, and test proper operation.
Wastewater system: ensure waste valves open and close properly.
7. Body and Sealing
External visual inspection: look for cracks, dents, paint blistering, or wall delamination.
Seals: carefully inspect around windows, doors, skylights, and roofs for cracks, shrinkage, or peeling.
Moisture test: use a moisture meter, especially in corners and around openings to prevent water infiltration.
Roof: inspect roof membrane (TPO, EPDM, fiberglass) for punctures or cracks.
Preventive repairs: apply sealant if necessary to maintain watertight integrity.
8. Exterior Accessories
Steps: test opening, closing, mechanism, and check stability under load.
Awning: deploy and inspect the fabric, articulated arms, and mounts for tears or mechanical weakness.
Rearview cameras: test visibility, adjust camera angle if necessary, and clean lenses.
Various sensors: test backup sensors, distance sensors, and other embedded electronic systems.
Tie-down elements: inspect anchor points for bikes, cargo boxes, or outdoor equipment to ensure strength.
9. Trailer (if applicable)
Chassis and hitch: inspect metal structure for rust, cracks, or deformation. inspect the hitch and coupling device for secure locking.
Electric brakes: test by connecting the trailer to the towing vehicle and checking braking response.
Electrical wiring: inspect trailer plug connections and rear lights.
Tires and wheel bearings: check tire wear and lubricate wheel bearings if necessary.
Stabilization system: verify that jacks or stabilizer legs operate properly to ensure parking safety.

Conseils pratiques avant de partir en voyage avec votre VR
Avant de prendre la route, il est essentiel de procéder à quelques vérifications et préparatifs supplémentaires pour assurer un voyage sécuritaire et sans souci.
Effectuer un test dynamique est fortement recommandé. Réalisez une courte sortie locale pour évaluer le comportement du VR en conditions réelles. Portez une attention particulière à la réponse des freins, au passage des vitesses, à la performance de la suspension et au bon fonctionnement des systèmes électroniques. Ce test permet de détecter rapidement toute anomalie avant un long déplacement.
Vérifiez l’ensemble de vos documents obligatoires : immatriculation valide du VR, preuve d’assurance couvrant votre parcours et, si nécessaire, permis de conduire adapté au poids du véhicule. Un contrôle rapide évite les mauvaises surprises en cas d’inspection routière
Préparez une trousse d’urgence complète. Celle-ci devrait inclure des outils de base (clés, tournevis, ruban adhésif résistant), des câbles de démarrage pour batterie faible, un extincteur fonctionnel, ainsi qu’une trousse de premiers soins bien garnie. Ajoutez également une lampe frontale, des gants de travail, et une réserve d’eau potable pour être prêt à toute éventualité.
Planifiez vos arrêts d'entretien si votre voyage s'étend sur plusieurs jours ou semaines. Identifiez à l’avance des endroits stratégiques pour faire le plein, vérifier les niveaux de fluides, inspecter les pneus et effectuer de petites maintenances préventives. Cela vous permettra de conserver votre VR en parfait état tout au long du voyage et d'éviter les imprévus mécaniques majeurs.
Practical Tips Before Hitting the Road With your RV
Before setting off, it’s essential to carry out a few extra checks and preparations to ensure a safe and worry-free journey.
Performing a dynamic test is highly recommended. Take a short local drive to assess the RV’s behavior under real conditions. pay close attention to brake response, gear shifting, suspension performance, and proper functioning of electronic systems. This test helps quickly detect any anomalies before a long trip.
Check all your mandatory documents: valid RV registration, proof of insurance covering your route, and, if needed, a driver’s license appropriate for the vehicle’s weight. A quick review can prevent unpleasant surprises during roadside inspections.
Prepare a complete emergency kit. It should include basic tools (wrenches, screwdrivers, strong adhesive tape), jumper cables for a low battery, a working fire extinguisher, and a well-stocked first aid kit. Also add a headlamp, work gloves, and a supply of drinking water to be ready for any situation.
Plan your maintenance stops if your trip spans several days or weeks. Identify strategic locations in advance for refuelling, checking fluid levels, inspecting tires, and performing minor preventive maintenance. This will help keep your RV in perfect condition throughout your journey and prevent major mechanical issues.
Conclusion
Taking the time to perform a complete seasonal inspection of your RV is an investment that maximizes your safety, protects your investment, and makes your adventure enjoyable and free of unpleasant surprises. Don't hesitate to consult a specialized professional if certain points seem complex. A well-prepared RV is the key to a successful journey!


Comments